Monotub Tek
15 tips in Teks & Methods
By Andrew Langevin · Founder, Nature Lion Inc · Contributing author, Mushroomology (Brill, 2026)
A monotub is a large plastic storage container (typically 54-66 quarts) that serves as both the colonization vessel and the fruiting chamber for bulk mushroom cultivation. The tub is filled with a layer of grain spawn mixed with bulk substrate (usually coco coir, vermiculite, and gypsum — known as CVG), and the mushrooms fruit directly from the surface.
Monotubs are the most popular bulk growing method because they offer an excellent balance of simplicity, yield, and consistency. A single well-managed monotub can produce 2-6 ounces dry weight per flush, with 3-5 flushes possible from one tub.
Why monotubs dominate:
- Self-regulating humidity — the enclosed tub with minimal air exchange maintains 90%+ humidity naturally
- Large flat surface area — provides more pinning real estate than jars or bags
- Scalable — you can run 1 tub or 20 with the same technique
- Cheap — a tub costs $8-15 and is reusable for dozens of grows
- Forgiving — bulk CVG substrate resists contamination better than nutrient-rich substrates
The monotub method requires grain spawn as an input, so you either need to make your own grain spawn or purchase it from a supplier. This is the main barrier to entry compared to PF Tek.
Here is the complete list for a standard monotub grow:
The tub: - Clear or translucent storage tote, 54-66 quart capacity - Matching lid (ideally with latching clips)
Modification supplies: - Hole saw or soldering iron for cutting holes - Polyfill stuffing or micropore tape - Duct tape (for sealing edges if needed)
Substrate: - Coco coir — 1 brick (650g) covers one monotub - Vermiculite (fine or medium) — 2 quarts - Gypsum (calcium sulfate) — 1/2 cup - Boiling water — approximately 4 quarts for hydration
Spawn: - Colonized grain spawn — 3-5 quarts (rye, oats, wheat, or millet)
Tools and supplies: - Large bucket (5-gallon) for pasteurizing CVG - 70% isopropyl alcohol spray bottle - Nitrile gloves - Spray misting bottle - Liner material — black trash bags (optional but recommended to prevent side pinning)
Total cost for a first monotub setup (excluding grain spawn) is typically $20-40 USD. The grain spawn is the main expense if purchased — roughly $15-25 for enough to fill one tub.
Hole placement and size control the air exchange and humidity balance inside your tub. There are two main approaches: modified (holes drilled in specific positions) and unmodified (no holes, using lid position for air exchange).
Standard modified monotub hole placement:
- 2 holes on each long side, positioned about 4-5 inches from the bottom of the tub (this should be just above substrate level). Use a 2-inch hole saw. These are your lower air exchange holes.
- 2 holes on each short side, positioned near the top of the tub, about 1-2 inches below the rim. Use a 2-inch hole saw. These are your upper air exchange holes.
- Total: 4 lower holes + 4 upper holes = 8 holes.
Filling the holes:
Stuff each hole loosely with polyfill (polyester stuffing from craft stores) or cover with micropore tape. The fill material acts as a filter — allowing gas exchange while maintaining humidity and blocking contaminants.
During colonization, stuff the holes tight or tape them completely. During fruiting, loosen the polyfill or partially open the tape to increase fresh air exchange.
Pro tip: Mark your substrate level on the outside of the tub before drilling. Lower holes should be at or just above the substrate line so fresh air flows directly across the surface where pins form.
The debate between modified and unmodified monotubs is one of the most discussed topics in mushroom growing. Both work — the difference is in how you manage air exchange.
Modified monotub: - Has drilled holes filled with polyfill or micropore tape - Provides passive air exchange without opening the lid - More hands-off once dialed in - Requires upfront effort to drill and position holes correctly - Risk: too much airflow dries the surface; too little causes overlay
Unmodified monotub: - No holes drilled — the tub is left completely intact - During colonization, the lid is latched shut - During fruiting, the lid is flipped upside down or cracked open slightly, creating a gap for air exchange - Simpler to set up (no drilling) - Requires more attention to dial in the lid gap
Which is better? Unmodified tubs have become increasingly popular because they are simpler and surprisingly effective. The flipped-lid method provides enough air exchange for most species while maintaining excellent humidity. Many experienced growers have switched entirely to unmodified tubs.
For beginners, unmodified is recommended — there are fewer variables to control and nothing to drill. If a tub is too wet, crack the lid more. Too dry, close it tighter. This intuitive adjustment is easier than stuffing polyfill to the right density.
Both polyfill and micropore tape serve the same purpose — filtering air exchange through drilled holes — but they behave differently and suit different growing environments.
Polyfill (polyester stuffing): - Allows you to adjust airflow by stuffing tighter (less air) or looser (more air) - Excellent at maintaining humidity because the fibers trap moisture - Cheap and widely available at craft stores - Downsides: can be difficult to get consistent density across all holes, may harbor contaminants if reused without cleaning, looks messy
Micropore tape (3M surgical tape): - Clean, consistent coverage - Easy to add or remove layers to adjust airflow - 1 layer = moderate restriction, 2-3 layers = high restriction - Available at any pharmacy - Downsides: adhesive may fail in high humidity, needs replacement between grows
Recommendation: Most experienced growers prefer micropore tape for its consistency and cleanliness. Use 2 layers during colonization and remove one layer when you switch to fruiting conditions. If you find your tub is drying out too fast, add a layer back.
Some growers use a hybrid approach — micropore tape over the holes with a loose wad of polyfill on top for extra filtration. This works well but is generally unnecessary for most home grows.
Spawning is the process of combining your colonized grain spawn with bulk substrate inside the tub. There are two schools of thought: layering and mixing.
Mixing method (recommended):
- Line the bottom of the tub with a black trash bag liner (optional but reduces side pinning).
- Combine your grain spawn and hydrated CVG substrate in a clean bucket or directly in the tub.
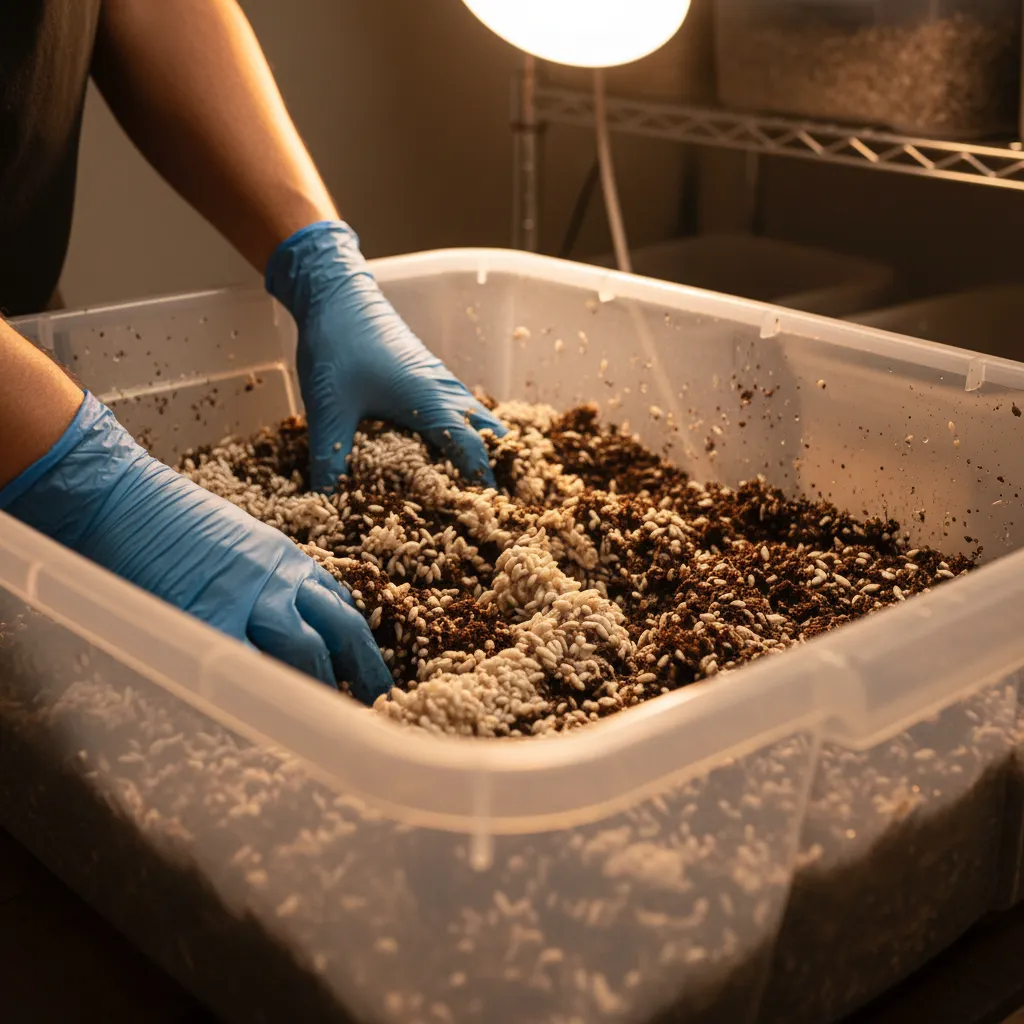
- Mix thoroughly by hand (wearing gloves sprayed with alcohol) until spawn is evenly distributed throughout.
- Spread the mixture evenly across the bottom of the tub to a depth of 3-5 inches.
- Optionally add a thin 1/4-inch casing layer of plain CVG on top.
- Smooth the surface gently with gloved hands.
Layering method:
- Spread a 1-inch layer of CVG on the bottom.
- Spread a layer of grain spawn.
- Repeat for 2-3 layers.
- Finish with a thin CVG casing layer on top.
Which is better? Mixing produces more even colonization and is faster. Layering was popular in older guides but offers no proven advantage. The vast majority of successful growers today use the mixing method.
After spawning, close the lid tightly and leave it in a dark area at 21-27°C (70-80°F) for colonization.
The spawn-to-substrate ratio determines how fast your tub colonizes and how resistant it is to contamination. The standard range is 1:2 to 1:4 (spawn to substrate by volume).
Common ratios and their trade-offs:
- 1:1 — Very aggressive colonization (3-7 days), but wasteful of spawn and can run too hot from metabolic heat. Not recommended.
- 1:2 — Fast colonization (5-10 days), excellent contamination resistance, good for beginners. Uses more spawn but provides a safety margin.
- 1:3 — The sweet spot for most growers. Colonizes in 7-14 days. Good balance of speed, spawn efficiency, and yield.
- 1:4 — Slower colonization (10-18 days) but maximizes yield per unit of spawn. Only recommended if your sterile technique is solid.
- 1:5+ — High risk of contamination due to slow colonization. Not recommended for beginners.
Practical example for a 66-quart tub:
- At 1:2 ratio: 4 quarts spawn + 8 quarts CVG
- At 1:3 ratio: 3 quarts spawn + 9 quarts CVG
Target a total substrate depth of 3-5 inches in the tub. Thinner substrates dry out faster. Thicker substrates hold moisture better and produce more flushes but take longer to colonize.
Beginner recommendation: Use a 1:2 ratio for your first monotub. The faster colonization outpaces contamination and gives you a better chance of success.
Monotub colonization typically takes 7-14 days at a 1:2 to 1:3 spawn ratio, with the surface appearing fully white with mycelium.
The golden rule: do not open the lid during colonization. Every time you open the lid, you introduce fresh contaminants and disrupt the CO2-rich environment that mycelium thrives in. Resist the urge to check progress. If your tub is translucent, you can observe colonization through the walls without opening.
What to expect:
- Days 1-3: Mycelium recovers from the spawning disturbance and begins spreading from each grain into the surrounding substrate.
- Days 3-7: White mycelium becomes visible on the surface as an expanding network of fuzzy patches.
- Days 7-14: Patches merge until the surface is 70-100% colonized.
Ideal conditions: - Temperature: 21-27°C (70-80°F) - Light: none needed — keep in a dark or dimly lit area - Humidity: the sealed tub maintains this naturally - Air exchange: minimal — sealed lid or taped holes
When is colonization done? When the surface is at least 75-80% covered with white mycelium. Some growers wait for 100%, but introducing fruiting conditions at 75% is fine for most species and can speed up the overall timeline.
If you see no growth after 7 days, something went wrong — likely dead spawn or contamination.
Fruiting conditions are introduced when the substrate surface is 75-100% colonized with mycelium. The switch involves increasing fresh air exchange (FAE), adjusting humidity, and introducing a light cycle.
How to trigger fruiting:
- Increase FAE: If modified, loosen polyfill or remove a layer of micropore tape. If unmodified, flip the lid upside down or crack it slightly.
- Begin misting: Lightly mist the walls and lid (not the substrate surface directly) 1-2 times daily. You want thousands of tiny water droplets visible on the walls — this is called the dew point effect.
- Introduce light: Provide 12 hours of indirect light per day. A nearby window or a 6500K LED/fluorescent works. Light is a pinning trigger, not an energy source.
- Lower temperature slightly: Dropping from 27°C to 21-24°C (70-75°F) helps trigger pinning for many species.
Signs fruiting is working:
- Primordia (pins) appear as tiny white bumps on the surface within 5-10 days
- Mycelium shifts from fluffy/rhizomorphic growth to knotting up into pin formations
- The surface may develop a slightly glossy or wet appearance
Common mistake: Fanning too aggressively. This dries out the surface and causes the mycelium to form a thick, leathery overlay instead of pins. If the surface looks dry or cracked, increase misting and reduce fanning.
Dialing in a monotub means fine-tuning the balance between humidity, fresh air exchange, and evaporation to create perfect pinning conditions across the entire surface. This is where the art of growing lives.
The three variables:
- Surface moisture: The substrate surface should have a light sheen of tiny water droplets (microclimate). If the surface is dry and cracked, humidity is too low or FAE is too high.
- Fresh air exchange (FAE): Mushrooms need oxygen and release CO2. Too little FAE causes long, leggy stems reaching for air. Too much FAE dries the surface.
- Evaporation: Gentle evaporation from the surface is actually the primary pinning trigger. Pins form where water evaporates from the mycelium.
How to dial in:
- Start with the lid cracked 1/4 inch (unmodified) or polyfill loosely stuffed.
- Check the surface 2-3 times daily. You should see thousands of tiny droplets.
- If the surface is pooling water — increase FAE (crack lid more, loosen polyfill).
- If the surface is dry and receding from the walls — decrease FAE and mist more.
- If stems are tall and thin with tiny caps — CO2 is too high, increase FAE.
- If pins only form at the edges near holes — center needs more airflow.
The goal state: Even pinning across the entire surface with short, thick stems and broad caps. When you see that, change nothing — you have found the sweet spot for your specific environment.
13shrooms is a community cultivator known for a high-yield monotub method that emphasizes generous spawn rates and aggressive colonization. His approach prioritizes speed over spawn efficiency, resulting in very fast tubs that outrun contamination.
Key elements of 13shrooms' method:
- High spawn ratio of 1:1.5 to 1:2 — he uses more grain spawn than most guides recommend, arguing that the faster colonization more than compensates for the extra spawn cost
- CVG substrate prepared with boiling water in a 5-gallon bucket, sealed with a lid for 2-4 hours until cooled to room temperature
- Thorough mixing — spawn and substrate combined directly in the tub with vigorous hand mixing for 2-3 minutes
- No casing layer — he skips the traditional top layer of plain substrate, arguing it delays pinning without meaningful contamination benefit
- Unmodified tub with lid flipped for fruiting — no holes drilled, no polyfill
- Minimal intervention — after spawning, the tub sits sealed for 7-10 days with no peeking, then the lid is flipped and left alone
His results are consistently good because the high spawn ratio creates aggressive mycelium coverage that colonizes in 5-7 days, leaving almost no window for contamination. The trade-off is higher spawn consumption per tub, but for growers who make their own grain spawn, this cost is negligible.
Beefs Beefy Tub is a community-developed monotub variation that focuses on maximum substrate depth and multiple flushes. The method gets its name from the thick, beefy substrate layer that holds more moisture and sustains more harvest cycles.
What makes it different:
- Substrate depth of 5-6 inches instead of the standard 3-4 inches. This requires more spawn and substrate but produces significantly more flushes.
- Spawn ratio of 1:3 — balanced to work with the extra substrate depth without wasting spawn.
- Heavy casing layer — a full 1/2-inch layer of plain CVG on top after mixing, patted down gently. This moisture reservoir helps sustain the thicker substrate through multiple flushes.
- Extended colonization time — the deeper substrate takes 14-21 days to fully colonize, which requires more patience but results in a very dense mycelium network.
Expected results:
- First flush is often slightly smaller than a standard tub due to the deeper substrate taking longer to pin evenly
- Subsequent flushes are significantly larger and more consistent
- Total of 5-7 flushes versus the typical 3-4 from a standard depth tub
- Total cumulative yield can exceed 8-12 ounces dry from a single 66-quart tub over its lifetime
This method is best suited for patient growers who want to maximize the total output from each tub rather than chasing the biggest possible first flush.
Frank's Bulk Spawning is a production-oriented monotub method designed for growers managing 10 or more tubs simultaneously. It emphasizes workflow efficiency and standardization over experimentation.
Core principles:
- Batch processing: All substrate is prepared in one large session using multiple 5-gallon buckets. Each bucket holds enough CVG for 2-3 tubs.
- Standardized spawn production: Frank runs grain jars on a staggered schedule so that fresh spawn is ready every 2 weeks, ensuring continuous production.
- Assembly-line spawning: All tubs are spawned in one session on a clean table wiped with alcohol. This minimizes the time spent in contamination-prone environments.
- Numbering system: Each tub is labeled with a number, spawn date, and genetics. This allows tracking performance across different strains and spawn batches.
Specific parameters:
- Tub size: 66-quart translucent tubs
- Spawn ratio: 1:2.5
- Substrate depth: 4 inches
- Colonization: sealed lid, 24-26°C (75-78°F), 10-14 days
- Fruiting: unmodified lid cracked 1/4 inch
Frank's key insight is that consistency beats optimization. By using the same ratio, same substrate, same tub, and same process every time, you eliminate variables and can quickly identify problems when yields drop. His approach is recommended for anyone scaling beyond hobby-level growing.
Boris's Greenhouse (GH) Tray method adapts monotub principles to aluminum foil trays inside a small greenhouse shelf unit. This approach maximizes growing space vertically and is popular with growers who want to run many grows in a small footprint.
Setup:
- Small greenhouse shelf unit — the plastic-covered wire shelf greenhouses sold at garden centers (typically 4-5 shelves, about 2 feet wide by 5 feet tall)
- Aluminum foil pans — deep half-size steam table pans (approximately 12x10x2.5 inches), available in bulk from restaurant supply stores
- Plastic wrap or humidity dome lids for covering trays during colonization
Process:
- Mix spawn and CVG at a 1:2 ratio directly in each foil pan to a depth of 2-3 inches.
- Cover each tray tightly with plastic wrap for colonization.
- Stack trays on the greenhouse shelves.
- After colonization (7-14 days), remove the plastic wrap.
- The greenhouse cover maintains ambient humidity around 80-90% naturally.
- Add a small ultrasonic humidifier at the bottom shelf if your climate is dry.
Advantages: You can run 15-20 trays in the footprint of a single monotub. Each tray produces less individually but the total output per square foot of floor space is much higher. This method is excellent for apartment growers or anyone with limited space.
Dunking rehydrates the substrate between harvests, allowing the mycelium to produce additional flushes. Each flush depletes roughly 70-80% of the substrate's available water, so rehydration is essential for continued production.
Dunking method:
- After harvesting all mushrooms from a flush, remove any leftover stumps or aborts by gently twisting them out.
- Fill the tub with cold tap water until the substrate block is fully submerged. The block will float — place a clean plate or another tub on top to weigh it down.
- Soak for 12-24 hours. Cold water is preferred — some growers use ice water to provide an additional cold shock that mimics seasonal changes and helps trigger the next flush.
- After soaking, drain all excess water by tilting the tub carefully. Let it drain for 15-30 minutes.
- Return the tub to fruiting conditions.
Expected timeline between flushes:
- Flush 1 to Flush 2: 7-14 days between harvest and next pins
- Flush 2 to Flush 3: 10-18 days
- Flush 3+: Increasingly longer intervals with diminishing yields
How many flushes? Most monotubs produce 3-5 flushes before the substrate is exhausted. First flush is typically the largest (40-50% of total yield). Each subsequent flush produces less.
When to stop: When the substrate shrinks significantly, pulls away from the walls, or develops green mold, the tub is spent. Compost the remaining substrate.
Need more help? Dr. Myco can answer follow-up questions about monotub tek based on thousands of real growing experiences.
Ask Dr. Myco