Fruiting Chamber Setup
10 tips in Fruiting & Harvest
By Andrew Langevin · Founder, Nature Lion Inc · Contributing author, Mushroomology (Brill, 2026)
A fruiting chamber (FC) is an enclosed or semi-enclosed space designed to maintain the high humidity, fresh air exchange (FAE), and stable temperatures mushrooms need to form fruit bodies. In nature, mushrooms fruit when environmental cues align; a fruiting chamber lets you replicate those cues on demand. The chamber traps moisture so relative humidity stays between 85-95%, while still allowing enough air exchange to prevent CO2 buildup. Without a chamber, indoor air is typically 30-50% RH, which will dry out primordia before they can develop into full mushrooms.
Chambers range from a simple plastic tub with holes to automated grow tents with humidifiers and exhaust fans. The best chamber for you depends on scale:
- A shotgun fruiting chamber (SGFC) works for one or two cakes
- A monotub handles 5-15 lb substrate blocks
- A Martha tent or grow tent suits anyone running multiple blocks at once
Whatever design you choose, the core goal is the same: create a microclimate where humidity is high, air is fresh, temperature is steady, and a little light signals to the mycelium that it has reached the surface and should fruit.
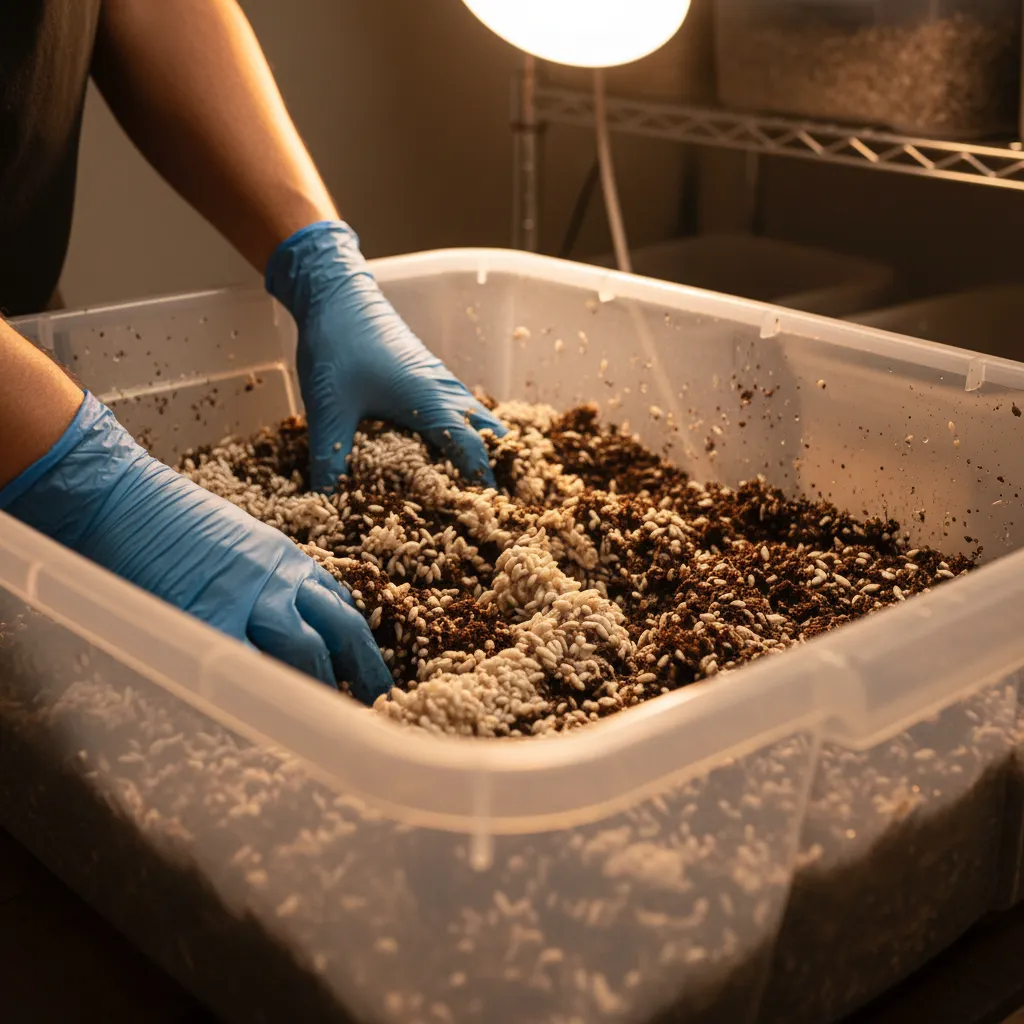
A shotgun fruiting chamber is the simplest and cheapest FC to build. You need a clear 50-70 quart storage tote, a 1/4-inch drill bit, and about 4 inches of damp perlite. Drill holes on all six sides of the tote on a roughly 2-inch grid pattern, including the bottom and lid. The holes create passive air exchange driven by convection: moist air rises out the top while dry air is drawn in through the bottom and sides.
Fill the bottom with coarse-grade perlite that has been soaked in water and drained. The perlite acts as a humidity reservoir, slowly releasing moisture into the chamber. Place the tote on four bottle caps or jar lids to elevate it slightly, ensuring the bottom holes are not blocked.
Set your colonized cakes or small bags on top of the perlite, either directly or on a piece of aluminum foil. Mist the perlite and walls 2-3 times per day with a fine-mist spray bottle and fan with the lid for 30-60 seconds after each misting.
A well-built SGFC can hold 85-92% RH without any electronic equipment. The main limitation is size: it suits BRF cakes and small grain bags but is not practical for full-size monotub blocks.
A monotub serves as both a colonization vessel and a fruiting chamber for bulk substrates. Start with a 54-66 quart clear tote. Drill two to four 2-inch holes about 4-5 inches from the bottom on the long sides for FAE, and one or two holes near the top on the short sides for additional exhaust. Stuff each hole loosely with polyfill to regulate airflow and act as a passive filter.
Spawn your grain to bulk substrate (typically coir, coir/verm, or straw) directly inside the tub, spreading it 3-4 inches deep. Snap the lid on and leave it sealed during colonization, usually 7-14 days until the surface is 75-100% white.
To initiate fruiting, either flip the lid upside down to create a small gap or simply crack it slightly. This increases FAE and triggers the transition from vegetative growth to fruiting. The substrate itself generates most of the humidity the mushroom needs; you should only mist lightly if you notice the surface drying out or tiny water droplets on the surface disappearing.
Monotubs are popular because they are low-maintenance, inexpensive, and consistently produce 1-3 lbs of mushrooms per flush from a single tub.
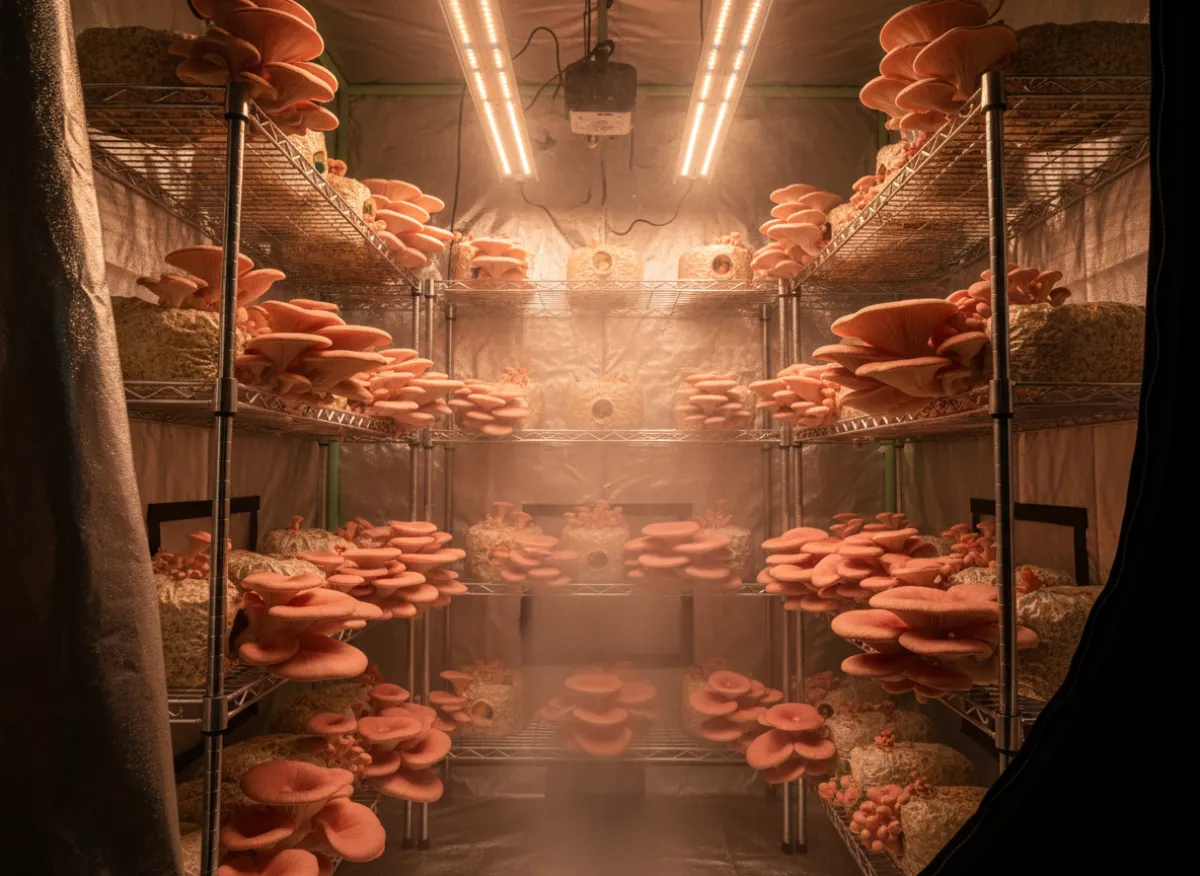
A Martha tent is a 4-6 tier greenhouse shelving unit wrapped in a clear plastic cover, adapted for mushroom fruiting. The setup provides excellent capacity: you can fruit 8-20 blocks across multiple shelves in about 2x4 feet of floor space. Start with a standard wire shelving unit and its plastic zip-up cover.
Cut a 4-inch hole near the bottom of one side and another near the top on the opposite side. Attach a small ultrasonic humidifier to the bottom hole using 4-inch ducting. Connect the humidifier to an Inkbird or similar humidity controller set to maintain 85-95% RH. The top hole serves as your exhaust; you can attach a small 4-inch inline fan on a timer running 1-2 minutes every 15-30 minutes to pull stale CO2-rich air out.
Key setup details:
- Place a hygrometer at shelf level to monitor conditions
- Line the bottom shelf with a drip tray to catch excess water
- Good airflow within the tent is critical: without the exhaust fan, CO2 builds up quickly and you will get long, leggy stems and small caps
Martha tents are ideal for growers scaling beyond monotubs, especially for species like oysters, lion's mane, and shiitake that benefit from top-down airflow across the fruiting surface.
Yes, grow tents designed for cannabis or indoor gardening make excellent mushroom fruiting chambers, especially at semi-commercial scale. A 4x4 or 4x8 foot tent gives you room for dozens of blocks on shelving.
The advantages over a Martha tent include:
- Better light-tightness for controlling photoperiod
- Built-in duct ports for humidifier intake and exhaust fans
- A reflective interior that distributes light evenly
- A waterproof floor tray
Set up shelving inside, run an ultrasonic humidifier or cool-mist humidifier through a bottom port, and mount a 4-6 inch exhaust fan on a timer at the top. Use a humidity controller (Inkbird IHC-200) to cycle the humidifier on and off, targeting 85-95% RH. Run the exhaust fan for 1-3 minutes every 15-30 minutes to flush CO2. Add a simple LED shop light or 6500K bulb on a 12/12 timer for the light cycle.
The main drawback is cost: a grow tent setup with controller, humidifier, fan, and lighting runs $150-400, compared to $30-50 for a monotub. However, the consistency and capacity make it worthwhile if you are fruiting more than 4-5 blocks at a time or growing for market.
Greenhouse tek uses a small outdoor greenhouse structure, typically a $30-80 portable plastic greenhouse from a garden center, as a seasonal fruiting chamber. The greenhouse traps humidity naturally and provides ambient light and some temperature buffering. This works best in spring and fall when outdoor temperatures are 55-75F (13-24C) and natural humidity is moderate to high.
Place your colonized blocks or logs on the shelves, mist heavily 2-3 times daily, and let natural air movement handle FAE. In hot, dry climates you can hang damp burlap or shade cloth over the greenhouse and run a small misting system on a timer. In humid climates like the US Southeast, the greenhouse may need additional ventilation to prevent bacterial contamination from stagnant, overly wet conditions.
Greenhouse tek is ideal for:
- Oyster mushrooms, shiitake logs, and wine cap beds that tolerate wider temperature and humidity swings
- Growers who want a zero-electricity approach: no humidifiers, no fans, no controllers
It is not well-suited for species that need tight environmental control like lion's mane or reishi. The tradeoff is seasonal availability and less predictable yields compared to indoor setups.
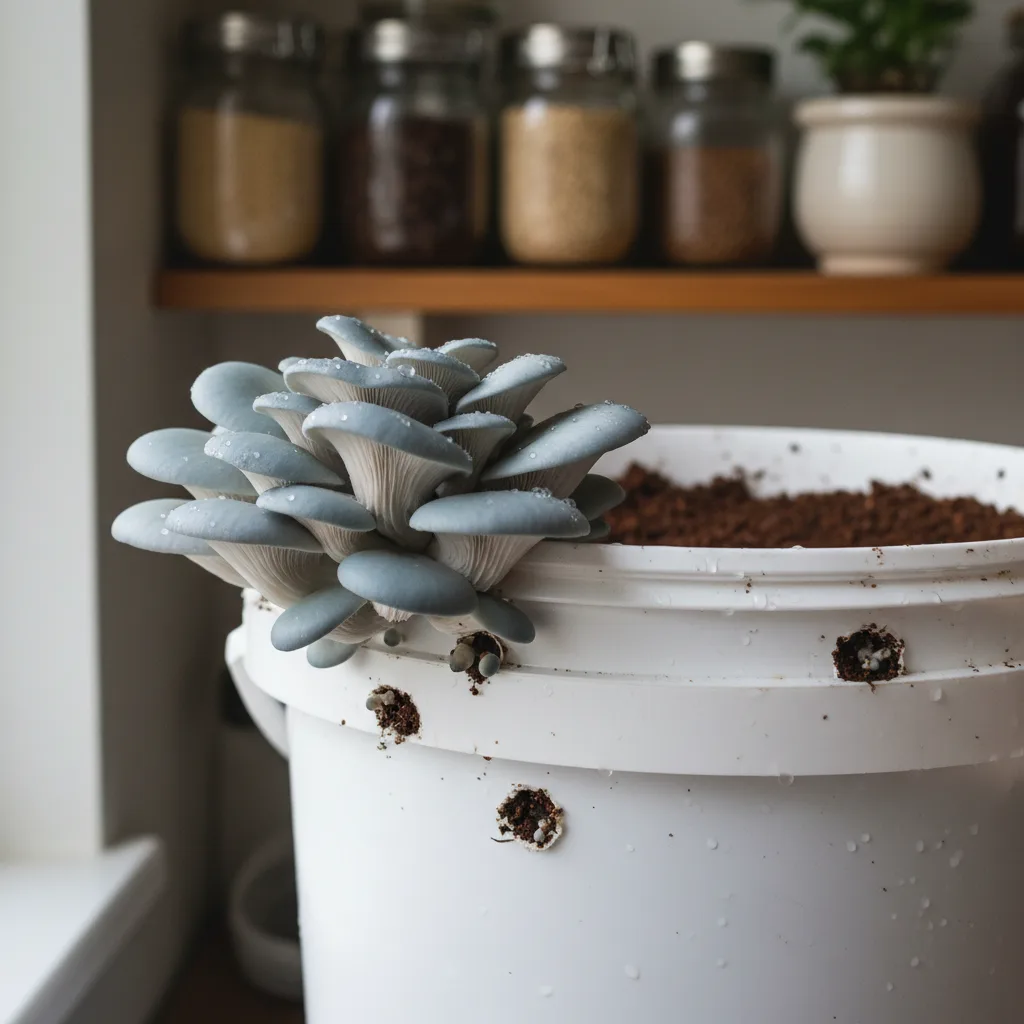
Fruiting from the bag, often called cut-and-fruit or top-fruiting, is the simplest method for beginners. Once your substrate block is fully colonized, cut an X or a 3-4 inch slit in the bag with a clean knife or razor. Some growers cut a large opening across the top and fold the bag down to expose the surface. The mushrooms will fruit from the cut opening where they sense fresh air and light.
Place the bag inside any fruiting chamber or simply in a humid spot: a clear tote with the lid cracked, a bathroom with a humidifier, or even a large clear plastic bag propped open with a chopstick. Mist around the bag 2-3 times daily to keep humidity up, but avoid misting directly into the cut as standing water on primordia promotes bacterial blotch.
Species-specific tips:
- For oyster mushrooms, a single X-cut on the side works perfectly since oysters naturally fruit from side openings
- For species like lion's mane, a top cut or large front opening encourages a single large cluster
Bag fruiting is low-effort and reduces contamination risk since the unexposed portions of the bag remain sealed. Expect slightly smaller yields than fully exposed monotub grows, but the convenience makes it ideal for beginners or small-scale growers.
Dialing in a monotub means adjusting hole size, polyfill density, lid position, and misting frequency until you hit the sweet spot of humidity and FAE for your species and climate. Start by observing surface conditions daily — if tiny water droplets are present on the substrate surface, humidity is good.
Common problems and fixes:
- Surface looks dry or cracked — more humidity needed: mist lightly, close the lid gap, or pack the polyfill tighter
- Excessive pooling, water running down sides, or sour smell — too much moisture, not enough evaporation: open the lid gap wider, loosen polyfill, or mist less
- Fuzzy white growth at the base of pins (fuzzy feet) — CO2 is too high and FAE is too low: increase the lid gap or remove some polyfill
- Cracking or splitting caps — FAE is too high and humidity is too low
Temperature also matters: keep the tub at 65-75F (18-24C) for most species. The substrate generates metabolic heat, so internal temperature may be 2-5F warmer than room temp. Use a digital hygrometer with a probe inside the tub to get accurate readings. Expect to spend 1-2 grow cycles fine-tuning before your monotub runs on near-autopilot.
Polyfill (polyester fiberfill, the same stuffing used in pillows and stuffed animals) serves two purposes in monotub holes: it acts as a passive air filter keeping contaminants out, and it regulates the rate of air exchange. When loosely stuffed, polyfill allows more airflow; when packed tightly, it restricts it. This gives you a simple, adjustable way to control FAE without fans or timers.
For a standard 2-inch hole, pull off a golf-ball-sized piece of polyfill and push it into the hole so it fills the opening without being compressed into a hard plug. You should be able to gently blow through it and feel air on the other side.
Common mistakes:
- Packing it too tightly — chokes off FAE, leading to CO2 buildup, elongated stems, and small caps
- Leaving it too loose — falls out or lets in flies and mold spores
If you are in a dry climate (below 40% ambient RH), pack the polyfill slightly tighter to retain moisture. In humid climates (above 60% ambient RH), keep it looser to prevent stagnant, overly wet conditions. Some growers replace polyfill with micropore tape over the holes, which also works well but is less adjustable.
Automating a fruiting chamber reduces daily maintenance from multiple misting sessions to occasional refills and harvesting. The core components are a humidity controller, an ultrasonic or cool-mist humidifier, an exhaust fan, and a light on a timer.
Key setup steps:
- The humidity controller (Inkbird IHC-200, about $35) plugs into the humidifier and turns it on when RH drops below your set point (typically 88%) and off when it reaches 93%
- Mount the sensor probe at block level inside the chamber
- For FAE, use a 4-inch inline fan or a small bathroom exhaust fan on a cycle timer: 1-2 minutes on, 15-30 minutes off
- A simple LED strip or shop light on a mechanical timer set to 12 hours on, 12 hours off provides the light cycle
- For larger setups, add a temperature controller connected to a small space heater if your grow area drops below 60F (16C)
Total cost for a fully automated Martha tent or grow tent is $150-300. Advanced growers use microcontrollers like Arduino or Raspberry Pi with DHT22 sensors to log data, send alerts, and fine-tune cycles remotely. Automation pays for itself quickly in consistency and reduced crop loss.
Need more help? Dr. Myco can answer follow-up questions about fruiting chamber setup based on thousands of real growing experiences.
Ask Dr. Myco