Grain Spawn Preparation
13 tips in Substrate Preparation
By Andrew Langevin · Founder, Nature Lion Inc · Contributing author, Mushroomology (Brill, 2026)
The most popular grains for mushroom spawn are whole rye berries, wild bird seed (WBS), whole oats, and millet. Rye berries are the gold standard — they hold moisture well, have good nutrition, and their rough surface gives mycelium excellent grip.
Here is how the common spawn grains compare:
- Rye berries: gold standard, excellent moisture retention and mycelium grip
- Wild bird seed (WBS): inexpensive, widely available mix of millet, milo, and sunflower seeds
- Whole oats: cheap and easy but slightly more prone to bacterial contamination due to starchy hulls
- Millet: small-grained, providing more inoculation points per volume for faster colonization
- Wheat berries: similar performance to rye
- Brown rice: used in BRF cakes but rarely as loose grain spawn
Avoid cracked, hulled, or quick-cook grains — they turn to mush. Feed-grade grain from farm supply stores is the most economical source, typically costing $15-25 for a 25 kg bag that will last dozens of grows.
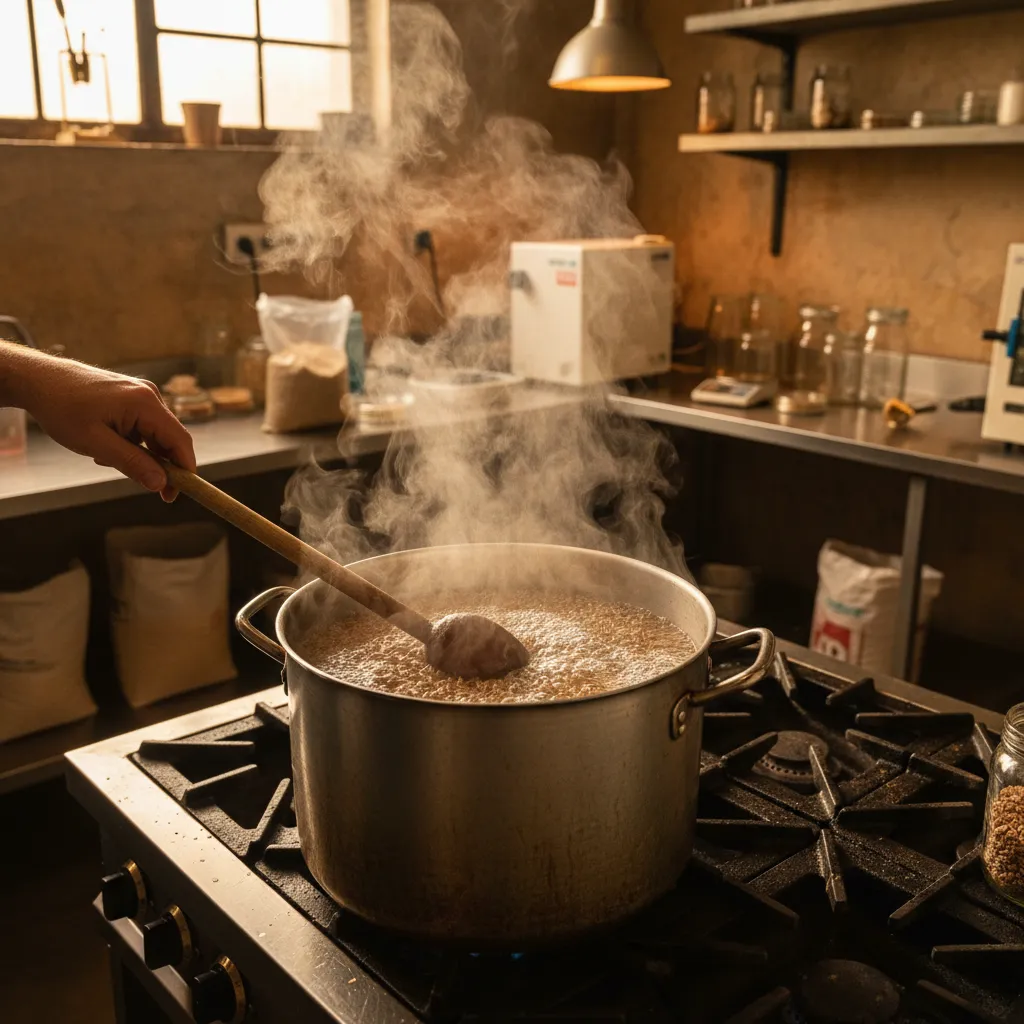
Start with 1.5 kg of whole rye berries. Rinse thoroughly under cold water to remove dust and debris. Soak the rye in a large pot covered with 8-10 cm of water for 12-24 hours — the grain will absorb water and swell significantly.
After soaking, follow these steps:
- Drain and rinse again
- Bring a large pot of fresh water to a boil, add the soaked rye, and simmer for 12-15 minutes
- The grain should be plump and soft enough to squish between your fingers, but not so soft that it bursts open
- Drain in a colander and spread on a clean towel or wire rack for 15-30 minutes to dry surface moisture — this step is critical
- The grain should feel dry on the outside but moist inside
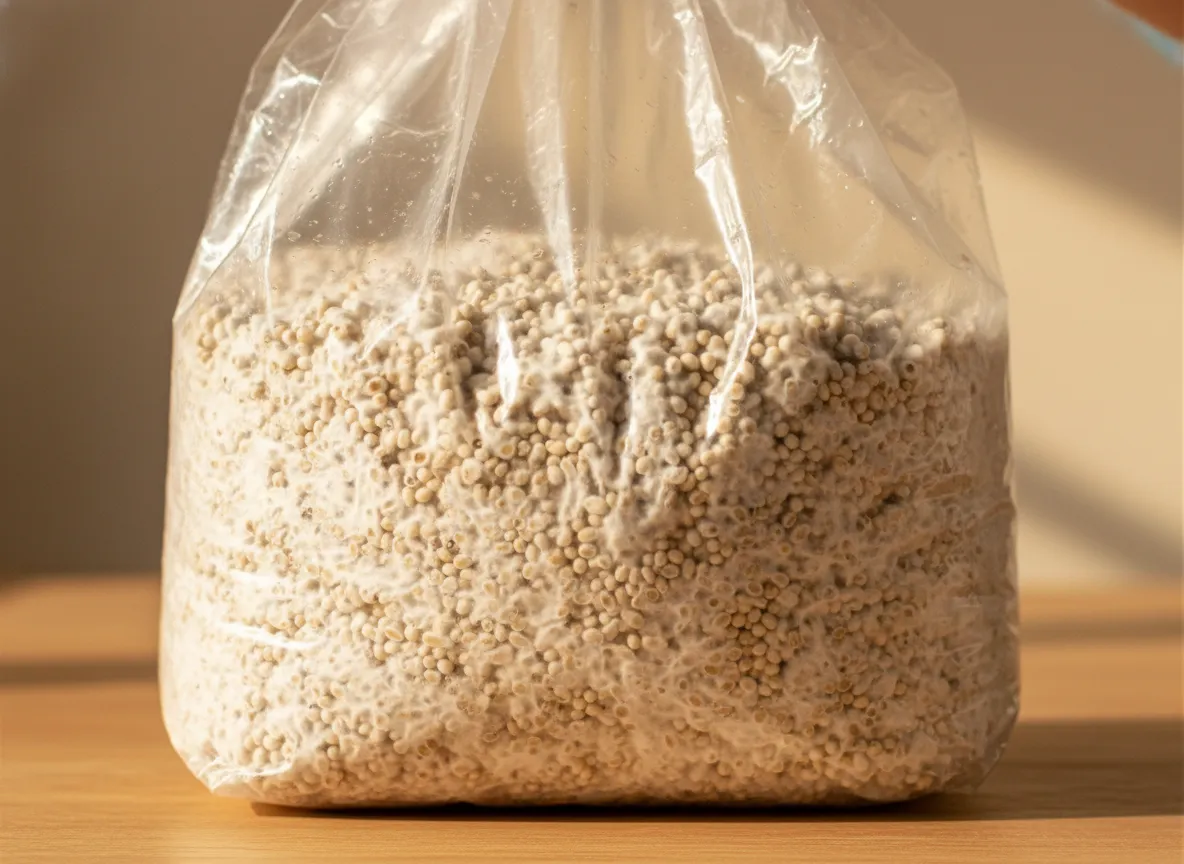
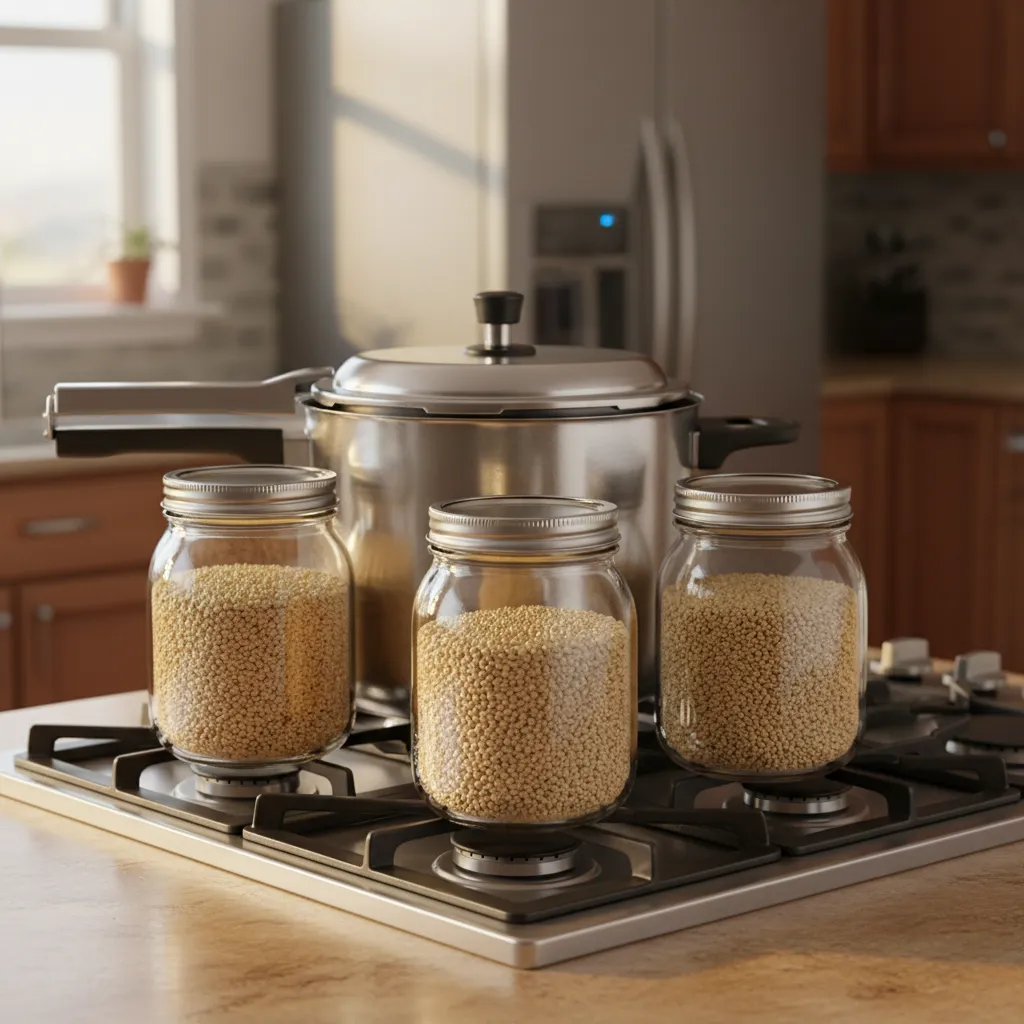
- Load into quart jars or spawn bags, filling jars no more than three-quarters full to allow shaking
- Add a pinch of gypsum (about 1 g per 500 g of grain) if desired
Pressure cook at 15 PSI for 90 minutes. Let cool to room temperature before inoculating.
Foo Man's method is a simplified WBS preparation that skips the soak and simmer. Purchase a bag of wild bird seed without sunflower seeds if possible (sunflower shells harbor contaminants).
Follow these steps:
- Rinse 1.5 kg of WBS in a colander under running water for 2-3 minutes
- Load the rinsed grain directly into quart mason jars, filling each jar about 60% full
- Add approximately 80-100 ml of water per quart jar
- Add 1 g of gypsum per jar and shake to distribute
- Cover jars with modified lids (polyfill or micropore tape over a drilled hole) and foil
- Pressure cook at 15 PSI for 90 minutes
- After cooling, shake the jars vigorously to break up any clumps
The water-to-grain ratio is critical — too much water and the grain turns to mush during sterilization. The grain should be moist but not clumped or wet. This method saves hours of prep time compared to traditional soak-and-simmer, and many growers report equal or better results.
Whole oats are one of the cheapest spawn grains, available at feed stores for around $12-15 per 25 kg bag.
Preparation steps:
- Rinse 1.5 kg of whole oats under cold water
- Soak in water for 12-18 hours — oats absorb water faster than rye, so don't oversoak or they'll become mushy
- Drain and bring a pot of fresh water to a boil
- Simmer the oats for only 8-10 minutes — less time than rye because oats soften faster
- Watch carefully: if the hulls start splitting open, the oats are overdone
- Drain immediately and spread on a towel to dry surface moisture for 20-30 minutes
- Load into jars at three-quarters full with 1 g gypsum per jar
- Pressure cook at 15 PSI for 90 minutes
Oats have a slightly higher contamination rate than rye because their starchy hulls retain more surface moisture. Thorough drying after simmering is the key to preventing this. Shake jars after cooling to break up clumps.
Millet produces the smallest individual grain kernels of the common spawn grains, which means more inoculation points per jar and faster colonization of bulk substrate when spawning. Use white proso millet from a feed store or grocery bulk bin.
Preparation steps:
- Rinse 1 kg of millet thoroughly — it's dusty
- Soak in water for 8-12 hours (shorter than rye due to smaller kernel size)
- Simmer for only 5-8 minutes — millet overcooks extremely fast and will turn into porridge if you're not careful
- As soon as the kernels are swollen and slightly translucent at the edges, drain immediately
- Spread on a towel and dry for 15-20 minutes, stirring occasionally
- Load into jars and add 1 g gypsum per 500 g of grain
- Pressure cook at 15 PSI for 90 minutes
After cooling, shake vigorously. Because millet kernels are so small, they clump together easily — thorough drying is essential. Millet's main drawback is that it compacts more than larger grains, so leave extra headroom in jars for shaking.
Soak duration depends on the grain type and size:
- Rye berries: 12-24 hours — the longer soak hydrates the dense kernel fully and initiates endospore germination, making bacterial spores vulnerable to heat during sterilization
- Whole oats: 12-18 hours — oats absorb water faster than rye so they need less time
- Millet: 8-12 hours — small kernels hydrate quickly
- Wild bird seed (traditional method): 12-18 hours
- Wheat berries: 12-24 hours, similar to rye
Under-soaked grain won't hydrate fully during simmering, resulting in dry centers that colonize slowly. Over-soaked grain becomes waterlogged and mushy, leading to bacterial wet spots after sterilization.
A good rule of thumb: the grain should swell to roughly 1.5 times its dry volume after soaking. If you forget and soak for 36+ hours, the grain may start to ferment — you'll smell a sour odor. Mildly over-soaked grain can be rescued by shortening the simmer time. Strongly fermented grain should be discarded and started fresh.
Simmer time varies by grain type:
- Rye berries: 12-15 minutes at a gentle boil
- Whole oats: 8-10 minutes
- Millet: 5-8 minutes
- Wild bird seed: 10-12 minutes
- Wheat berries: 12-15 minutes
The purpose of simmering is twofold: it further hydrates the grain interior and it activates (germinates) dormant bacterial endospores on the grain surface, making them vulnerable to killing during pressure cooking.
Under-simmered grain will be too dry inside and colonize slowly. Over-simmered grain bursts open, releasing starch that creates a sticky mess — the perfect environment for bacterial contamination. The visual test: cut a kernel in half. It should be uniformly hydrated throughout (no dry white center), soft enough to squish between your fingers, but still intact with the hull unbroken. If hulls are splitting, you've gone too long. Always simmer at a gentle boil, not a rolling boil — aggressive boiling agitates the grain and causes more splitting.
Excess surface moisture on grain is the number one cause of bacterial contamination in spawn jars. Even if you sterilize properly, too much water on the grain surface creates anaerobic pockets where Bacillus bacteria thrive, producing the dreaded wet spot contamination — glossy, slimy, sour-smelling grain.
After draining your simmered grain, spread it in a thin layer on a clean towel, wire cooling rack, or clean pillowcase. Let it dry for 15-30 minutes, stirring every 5 minutes to expose all surfaces. Some growers run a fan over the grain to speed drying.
The grain is ready when:
- Individual kernels don't stick together
- The surface feels dry to the touch
- No moisture transfers to your hand when you grab a fistful
- Grain poured from one container to another flows freely without clumping
If kernels stick together in wet clumps, keep drying. This single step will prevent more contamination than almost any other improvement to your process.
Quart mason jars are the standard for home-scale growers. Fill jars no more than three-quarters full to leave room for shaking, which breaks up colonized grain and redistributes mycelium. Use modified lids with a hole drilled or punched and covered with micropore tape or polyfill for gas exchange. Jars are reusable, cheap (about $1 each), durable, and easy to inspect. Their downside is limited volume — each quart jar holds roughly 450-550 g of hydrated grain.
Spawn bags (autoclavable polypropylene bags with a filter patch) hold 1-4 kg of grain each, making them more efficient for larger operations. They're single-use and cost $0.50-1.50 each. Bags are sealed with an impulse sealer before sterilization. They're harder to shake than jars but easier to break apart and mix into bulk substrate.
For beginners, start with quart jars — they're forgiving, easy to inspect for contamination, and you can run multiple small batches to test your process. Switch to bags when you're consistently getting clean jars and want to scale up.
The standard is 90 minutes at 15 PSI (103 kPa) for quart jars of grain. This is a non-negotiable minimum — shorter times leave heat-resistant endospores alive, leading to bacterial contamination days later.
For larger containers:
- Quart jars: 90 minutes
- Half-gallon jars: 120 minutes
- Spawn bags over 2 kg: 150 minutes
Start timing only after your pressure cooker reaches a full 15 PSI — this typically takes 20-30 minutes of heating before the timer begins. Maintain a steady, gentle rocking of the weight or gauge at 15 PSI throughout. Dropping below 15 PSI at any point means restarting the timer.
After the cook, turn off the heat and let the pressure cooker depressurize naturally — never force-cool it by running water over the lid, as this can suck contaminated air back into the jars through the lids. Natural cooling takes 4-8 hours. Many growers pressure cook in the evening and let the cooker sit sealed overnight, inoculating the next morning when jars have reached room temperature.
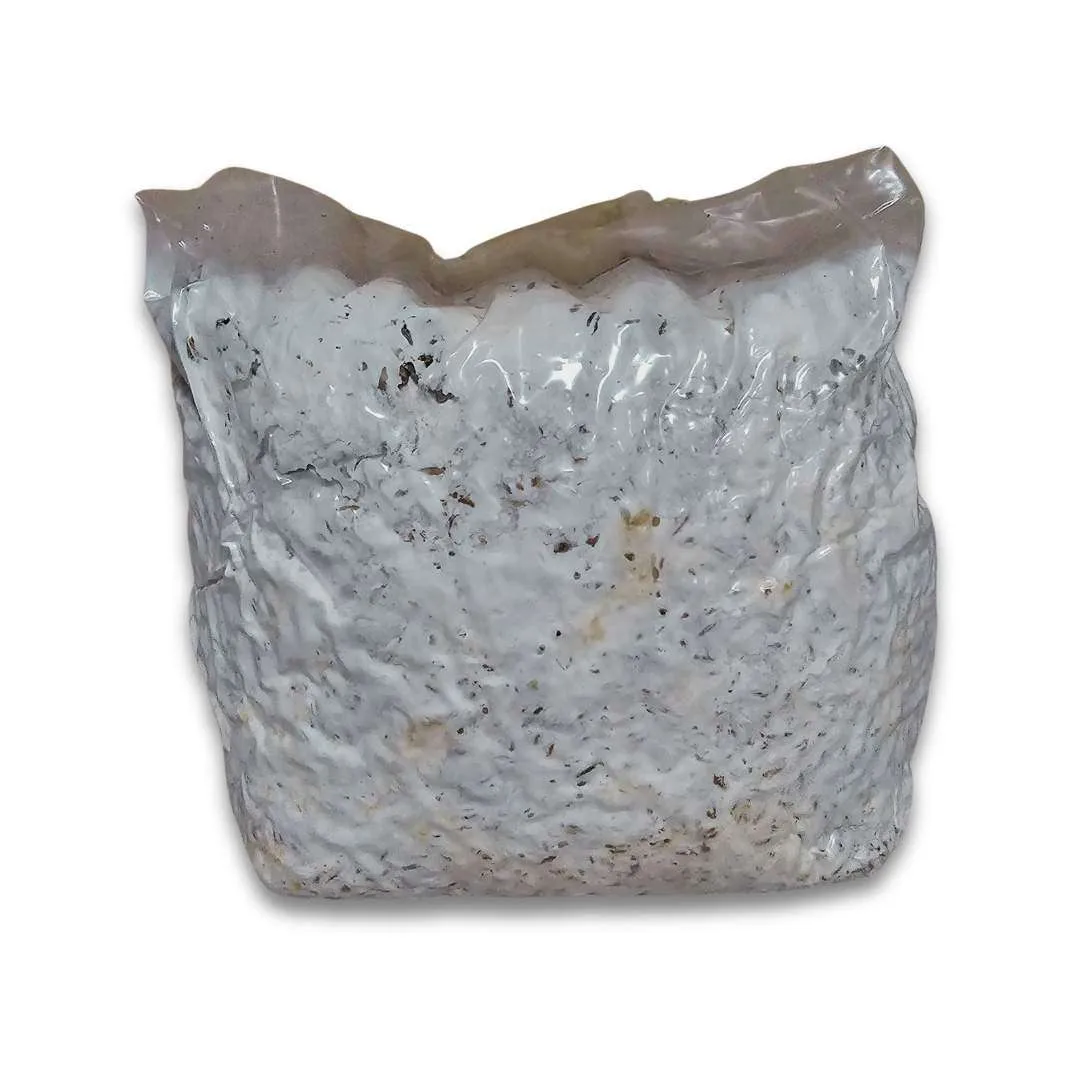
Fully colonized grain spawn is covered in thick white mycelium with no visible uncolonized grain kernels remaining. When you look through the jar, every kernel should be coated in white. The process typically takes 10-21 days depending on species, temperature, and inoculation rate.
Shake your jars once at around 30% colonization (typically day 5-7) to redistribute the mycelium and speed up colonization — this can cut total colonization time by 30-40%. After shaking, the jar will look mostly bare grain again but will re-colonize much faster because mycelium is now distributed throughout.
Wait until the jar is 100% white before using it to inoculate bulk substrate. Using partially colonized spawn increases contamination risk because uncolonized grain is vulnerable to contaminants. Fully colonized spawn also has a stronger immune response and colonizes bulk substrate faster. At room temperature (21-24C), most species fully colonize a quart jar in 14-21 days from a multi-grain inoculation.
Healthy colonized grain spawn is uniformly bright white throughout the jar. The mycelium forms a thick, continuous coating around every kernel. When you shake the jar, the colonized grain should break apart into individual kernels or small clumps — it should not be a single solid mass stuck together (though some clumping is normal).
Rhizomorphic growth (thick, ropy strands) is ideal and indicates strong genetics. Tomentose growth (fluffy, cotton-like) is also healthy but generally indicates weaker genetics. The smell should be clean, earthy, and slightly mushroomy — never sour, sweet, or fermented.
Key signs of healthy spawn:
- Metabolite droplets (clear to amber liquid beads on the mycelium) are normal and indicate active defense against competitors
- No non-white coloring — green, pink, orange, or black spots indicate contamination
- No pooled water at the bottom of the jar — standing liquid means excess moisture and likely bacterial issues
- The jar should feel uniformly firm but not rock-hard
Sour-smelling grain spawn has bacterial contamination, most commonly Bacillus species. The sour or vinegary odor comes from organic acids produced by bacteria fermenting the grain starches.
Common causes include:
- Grain that was too wet when loaded into jars (insufficient surface drying after simmering)
- Insufficient pressure cook time (less than 90 minutes at 15 PSI)
- Pressure dropping below 15 PSI during the cook cycle
- Jars that were inoculated with a contaminated syringe or culture
If only one or two jars out of a batch smell sour, the sterilization was likely adequate but the inoculation introduced bacteria — review your sterile technique. If the entire batch smells sour, the sterilization failed — check your pressure cooker gauge calibration and ensure you're reaching a true 15 PSI.
Sour grain cannot be saved. Discard it outdoors (the sour bacteria can produce endospores that survive in your kitchen). Do not open sour jars indoors. Clean your pressure cooker and re-evaluate your grain prep moisture level before trying again.
Need more help? Dr. Myco can answer follow-up questions about grain spawn preparation based on thousands of real growing experiences.
Ask Dr. Myco